|
|
PCB
- Printed Circuit Board
 Etching
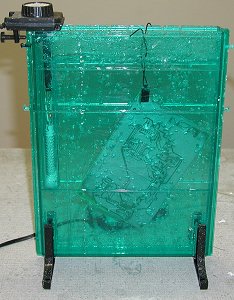
Place the PCB in the etch tank. The etch tank is a tall, thin tank
that contains the etching chemical. Common etching chemicals include
Ferric Chloride and Ammonium Persulfate. The tank also contains a
heater and bubbler. The bubbler pumps air through the tank to
agitate the chemicals to speed up the etching process. Etching
typically requires 3-5 minutes with a fresh, heated solution. TIP
- Ammonium Persulfate is a clear etching chemical that produces
less caustic vapors than Ferric Chloride, is easier to clean up, and
doesn't stain. Etching
Place the PCB in the etch tank. The etch tank is a tall, thin tank
that contains the etching chemical. Common etching chemicals include
Ferric Chloride and Ammonium Persulfate. The tank also contains a
heater and bubbler. The bubbler pumps air through the tank to
agitate the chemicals to speed up the etching process. Etching
typically requires 3-5 minutes with a fresh, heated solution. TIP
- Ammonium Persulfate is a clear etching chemical that produces
less caustic vapors than Ferric Chloride, is easier to clean up, and
doesn't stain.
 |
 |
PCB
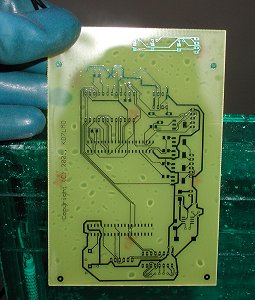
in etch tank and after etching process is complete.
Tin Plating
After
etching, the ink left on the board is removed with a solvent such as MEK
or Acetone. The exposed copper is protected by placing the board in
a tinning solution or Fluoboric Acid. The solution will cause the
copper to change colors to a silver or tin color. Tinning improves
the solder ability of the board, prevents copper oxidation, and gives the
PCB a finished appearance.
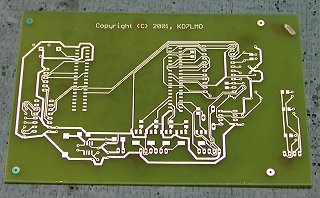
PCB after tinning.
Drilling /
Sizing The
final step to creating the PCB is drilling holes for mounting the through
hole components and connectors. The use of surface mount components
greatly simplifies the final construction of a PCB. In addition,
surface mount components allow for smaller designs, elimination of
potential socket failures, and a wider selection of components.
|


